When
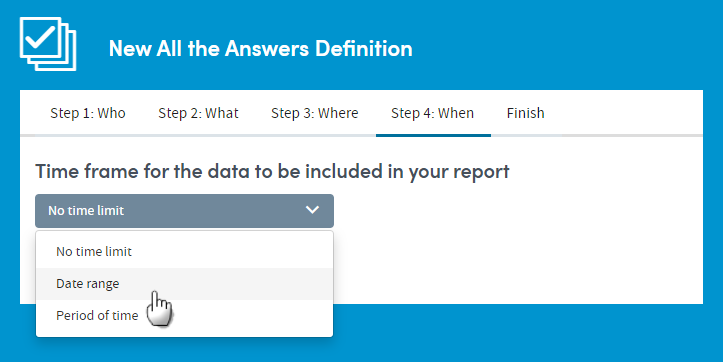
This step lets you set time limits on the data to be included in your report. You can choose to apply a date range or time period to the data from your selected sources, or you can select the No time limit option.
If you choose Date range or Period of time, you’ll then select a date range by clicking the calendar icons, or choose a period of time from a drop-down list (the last week, the last year, etc.):
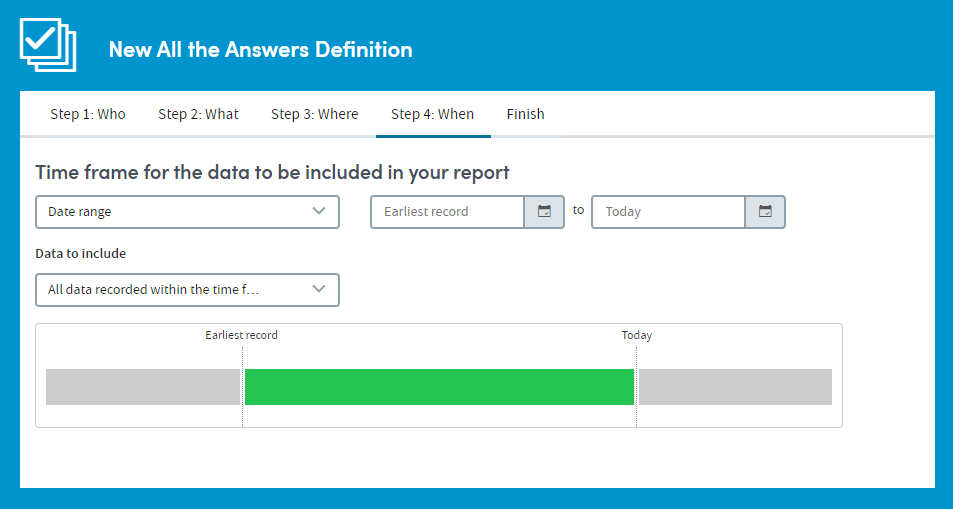
Once a date range or time period has been selected you need to decide which data from which admissions/visits to include within the time frame. Because admissions/visits themselves have a duration, there is the potential for overlap between the duration of an admission/visit and the time frame selected.
The options are:
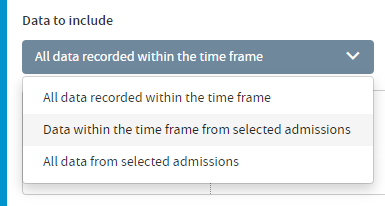
All data recorded during the time frame: The report will include any and all data which was only recorded during the time limits you have set.
- Data within the time frame from selected admissions/visits: The report will include data which was only recorded during the time limits you have set, and is also data which was only recorded during admissions/visits meeting specific time-bound criteria (which you will select).
- All data from selected admissions/visits:The report will include all data from your selected admissions/visits, even if some of this data was recorded during a time which extends beyond the time limits you have set. For example, if you have set a date range of January 1st 2015 – December 31st 2015 and have chosen to include data from admissions/visits that ‘neither began nor ended within the time frame’ (see below), then your report will include analysis of data pertaining to such admissions/visits that was recorded before January 1st 2015 or after December 31st 2015 (as well as the data recorded within the timeframe).
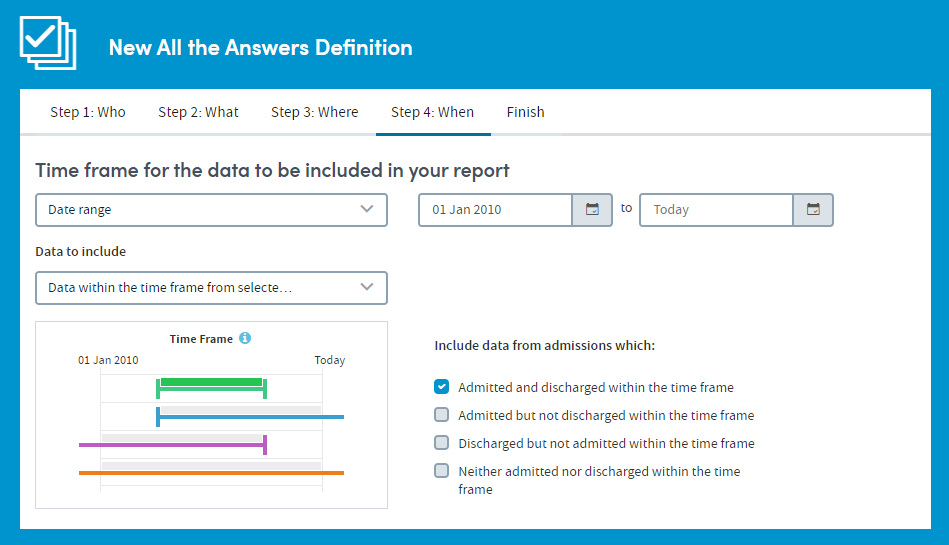
If you select either of the last two options, you will be presented with up to four specific time-bound criteria to select from. You can choose any available combination of these types using the tick boxes:
Make your selections and click Finish to move on to the Report summary.
Events and Processes App
There are some aspects of the When: step which are specific to the Events and Processes App:
If you choose to set a time frame, whether it be a period of time, or a specific date range, you will see an extra element on the screen that does not appear in other Apps, under the heading Data to include:
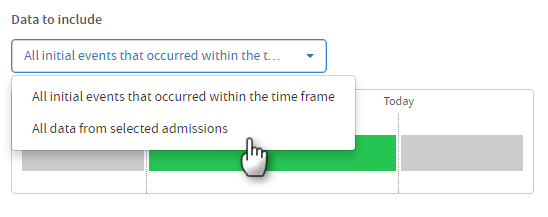
You have two options:
All initial events that occurred within the time frame
This option means that the data in the report output will only include time intervals where the initial event you selected (in Step 2: What) took place during the time you’ve specified here.
For example, if your initial event is admission date and your subsequent event is discharge date, the output will only report on the time intervals between those two events when the admission date occurs during the time period you specify here – be that a period of time (the past week, the past year, etc), or a specific date range.
This enables you to set a tight start boundary on the data in your report.
All data from selected admissions
This option enables you to extend the boundaries of the data included in your report output beyond those you specify when selecting your time frame.
The report output will contain all the data recorded during the time frame you’ve specified, be that a period of time (the past week, the past year, etc), or a specific date range. However it will also contain data which may have been recorded during an admission, at a time which extends beyond the time limits you have set.
There are up to four types of admission available to select from. You can choose any available combination of these types using the tick boxes which appear when you choose this option.
Make your selections and click Finish to move on to the Report summary.