- Home
 Atmolytics
-
Apps
-
All the answers
-
All the Answers: report creation
All the Answers: report creation
To create an All the Answers report:
You’ll be taken to the What: screen:
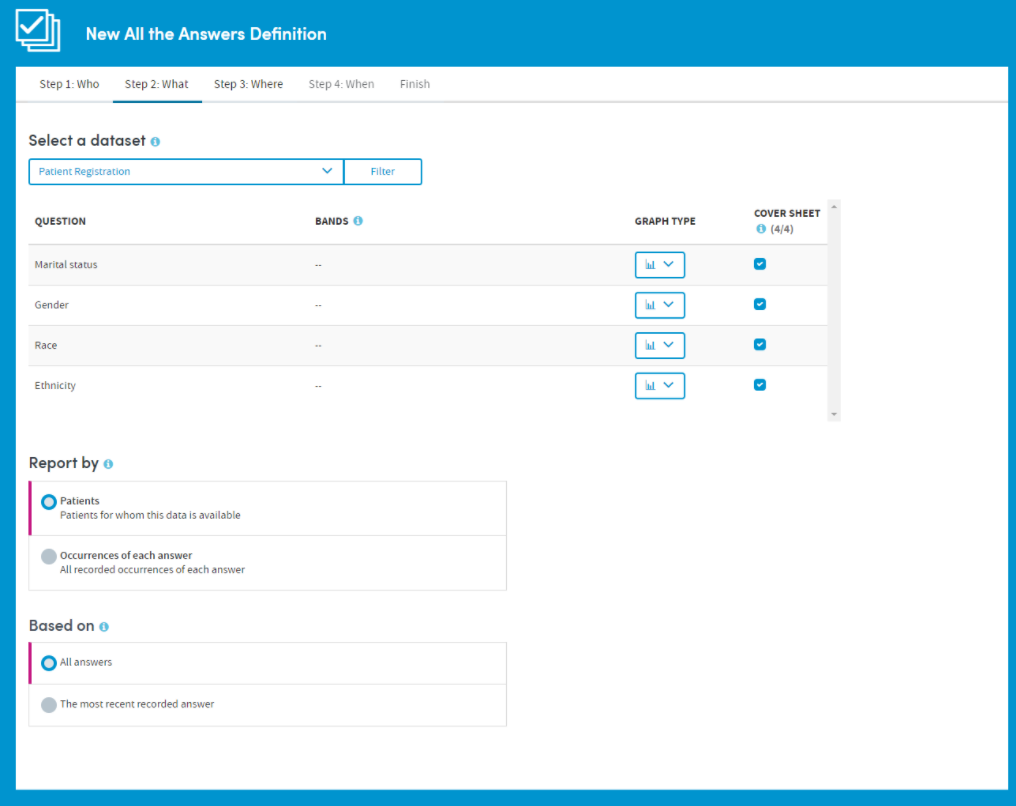
Here you’ll:
- Select a dataset;
- Filter your dataset;
- Apply various other criteria to your report output
These steps are fully explained in the tabs below.
You can choose any form or dataset available to you. You may only choose one dataset for each All the Answers report you create.
Choose from those available to you by clicking the drop-down arrow:
There are two ways to identify and select datasets: by simply choosing from the drop-down list, or by searching.
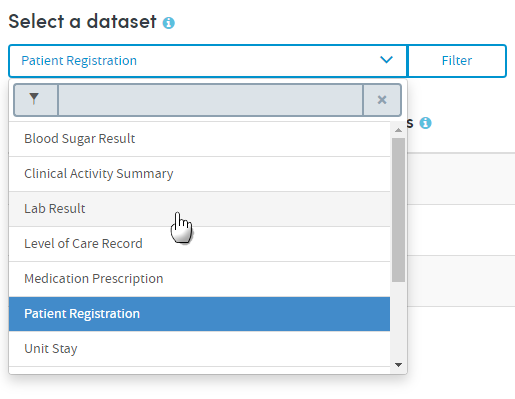
How to search for datasets
Start typing your search text into the grey text box:

The list below will dynamically display all the datasets containing your search text, wherever it appears in the name:

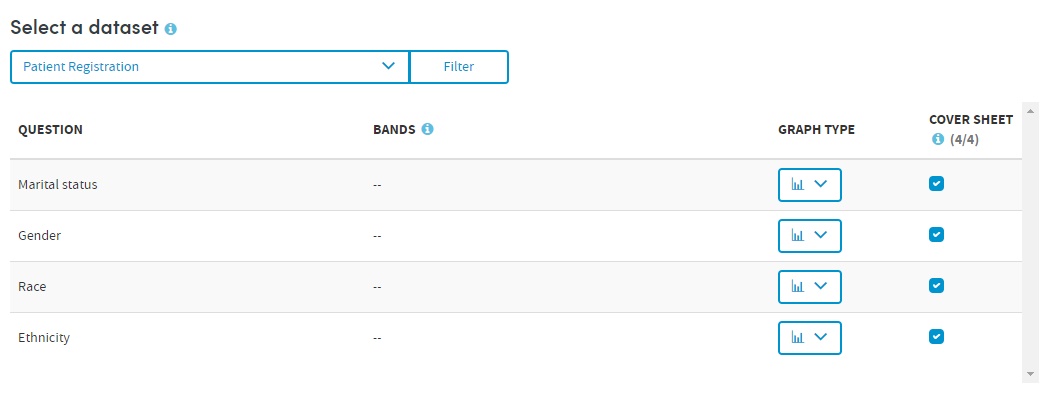
Once you’ve found your dataset, click its name to select it for inclusion in the report. The dataset name will be displayed on screen, and below that you’ll see a list of all the questions in that dataset whose answers are suitable for inclusion in an All the Answers report.

If you choose to ignore the filter option, your report will include all the answers for every relevant question in the dataset you’ve selected. In our example, that would mean that all the relevant data about every recorded Lab Result would be included in our report.
You can add further filters to your report criteria if you wish, to narrow down the data included in your report. For example, you may want to report on data relating only to HGB lab results in your cohort.
To do this you’d first choose the Lab result dataset (as shown above). Next, click the Filter button next to the dataset name. You’ll see a pop-up screen similar to the one in the example below:
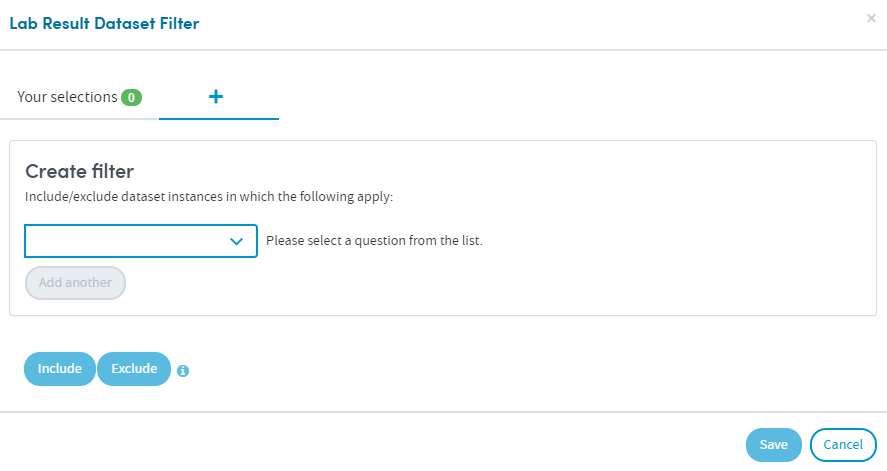
Click the drop-down arrow to select a question from the list (in this case, the Lab test item). If you prefer, you can search for the item instead of browsing the list. Enter the search text in the grey text box. Either way, click the item to select it:
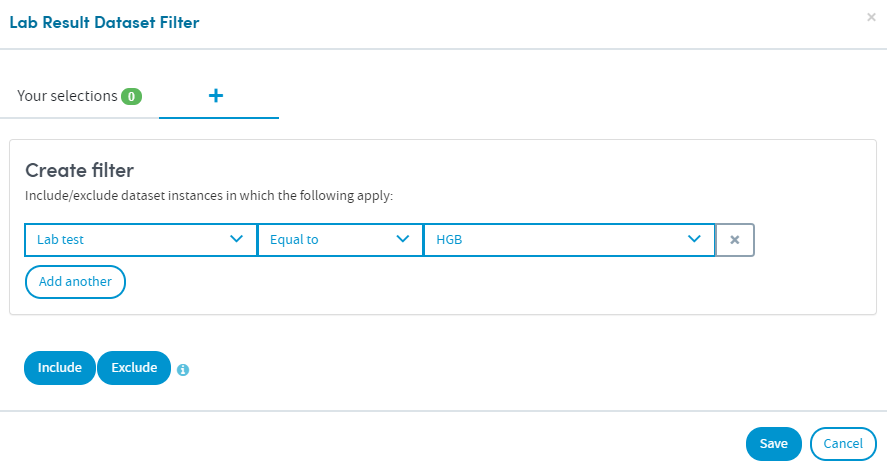
Every selection has three elements:
- The data item or question, e.g. Lab test
- An operator, e.g. Equal to
- The answer, e.g. HGB
Make your selection from the drop-down lists.
In the example above we have selected Lab test > Equal to > HGB as a filter. Now our report will only include data pertaining to HGB lab tests and no other types of lab test.
Click the X on the right if you want to remove a filter after you have set it.
At the bottom of the panel there are two buttons, Include and Exclude. Choose whether your report should include or exclude the filter criteria, by clicking one of these options. Once you’ve done that, your filter will be applied, and you can add more filters if you wish.
If you want to create several Include filters, click Add another to add more filter items, before clicking the Include button. The same applies to the Exclude option.
Viewing and working with your filter selections
The number of filters you have created can be seen next to Your selections towards the top left of the panel:
You can view and, if applicable, make further decisions about how your filters are applied in the Your selections tab:
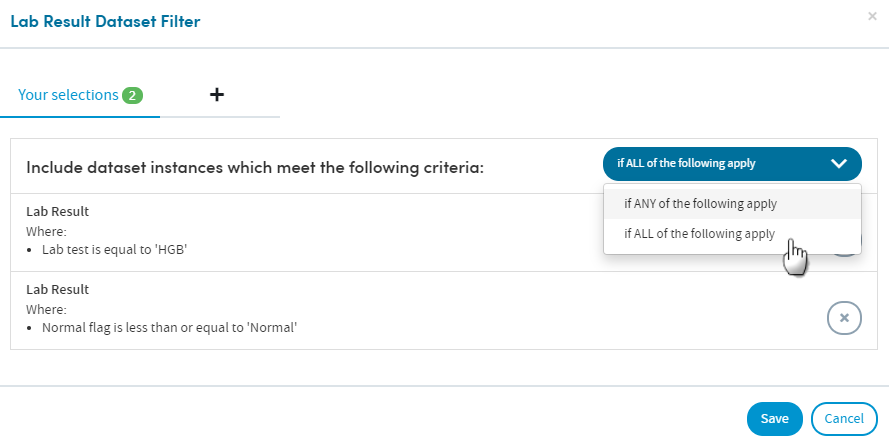
Click the white down-arrow to choose whether to select patients who meet ANY of the criteria or ALL of the criteria. This can be selected separately for both inclusions and exclusions.
Click the cross to remove a filter from your selections.
Atmolytics presents you with a list of graph types relevant to each data item:
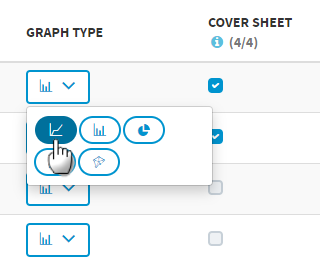
Choose from the options available to you.
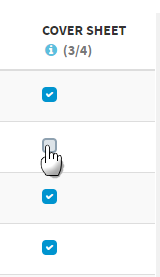
Every report output has a cover sheet which shows selections from the full report results.
Up to four data items can be selected for viewing on the cover sheet, and you must choose at least one.
Click the check boxes to make your choice:
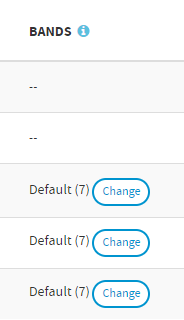
Where applicable, data is divided into bands for reporting purposes. Banding is applied to all data items used to collect numeric data.
If banding applies to a particular data item, the details will appear in the Bands column. Default bandings will have been set by your system administrator, but you can edit these if you wish.
Hover the mouse over the Default text to see the default bandings which have been set for the data item by your system administrator:
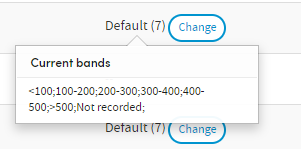
Click Change if you want to see more details of the bandings for the data item, or change them. You will see two options: Default and Custom:
Default
These are the bandings set by your system administrator:
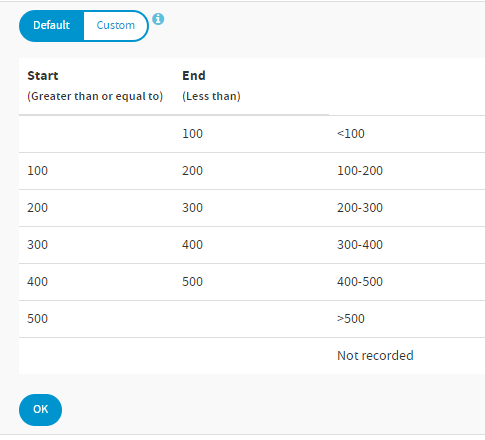
Custom
Click Custom to edit the parameters of the bandings:
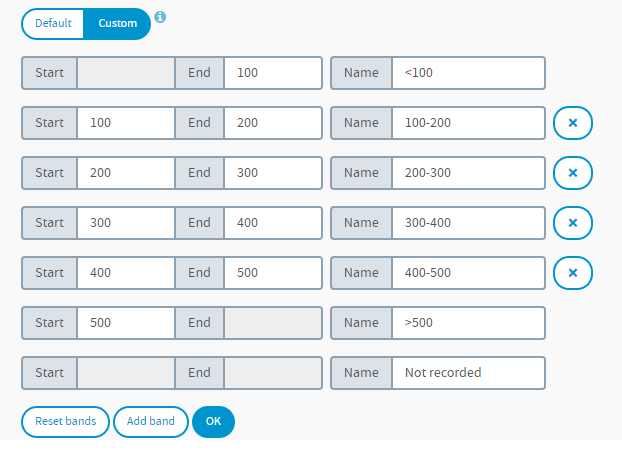
You can add or remove bandings, and edit the band names. The band names are used in the report output as labels for the charts and graphs. Clicking Reset bands will put the parameters and names back to the default settings created by your system administrator.
This selection determines what is counted within the report. The options are as follows (depending on the nature of your data you may not see every option here):
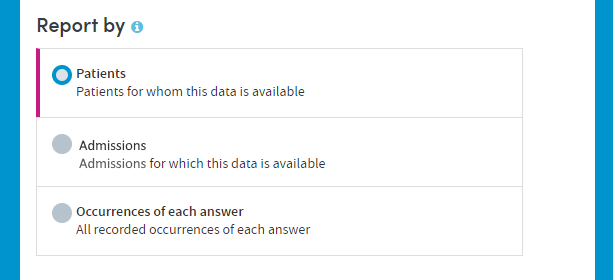
Patients
This counts the number of patients with each answer to each question.
For example, if the data item is gender, it will tell you how many patients in your selected cohort(s) are male or female.
Admissions
This counts the number of admissions/visits with each answer to each question.
For example, if your data item is gender, it will tell you how many admissions/visits involved patients who were male or female.
The option you choose will affect the data counts in your report.
Example
1000 patients may have been admitted to hospital this year but 100 may have been admitted twice, so there will have been 1100 admissions.
Consequently, counts for each data item would add up to 1100 if count admissions/visits is selected, as opposed to 1000 if count patients is selected.
Occurrences of each answer
This counts the number of occasions on which each answer has been recorded for each question, regardless of the number of patients or admissions/visits those answers pertain to. This option is useful for audit purposes and would not be used routinely.
Example
Consider the question ‘What is your sexual orientation?’ A report based on all answers might reveal that on 75% of occasions the answer was Did not disclose, in which case there might be a good case for changing the way the question is asked in order to get better information.
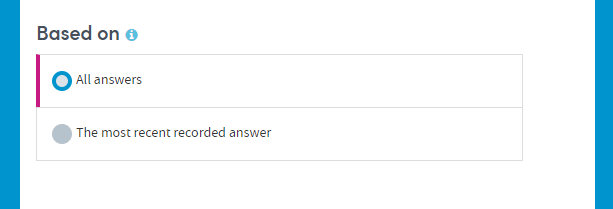
Based on: All answers
If this option is selected, your report will count all answers to a data item for each patient or admission/visit. Many data items are recorded on more than one occasion, e.g. a patient’s blood pressure. This means that the number of observations will be greater than the number of patients.
Consequently, answer counts in the report can add up to more than the number of patients, because some patients will have had different answers to the same question on different occasions.
Example
Suppose 20 patients visited their doctor twice this year and for each patient on one occasion blood pressure was normal and on the other it was high.
If all answers are included in the report and the report is counting patients, the output will show Patients=20, Normal=20 and High=20 because each patient had two observations.
Similarly, if the report is counting visits the output will show Visits=40, Normal=20 and High=20.
Counts can also add up to more than the number of admissions/visits, because some patients will have had different answers to the same question on different occasions during the same admission/visit. For example, a patient may be recorded as having high blood pressure upon admission and normal blood pressure upon discharge.
Based on: Only the most recent answer
This option allows you to choose to include only the most recent answer to each data item in your report. This could be the most recent answer per patient or per admission/visit, depending upon your Count selection above.
Example
If a physician wanted to know how many of his patients currently had high blood pressure, he might choose to count only the most recent observation for his patients.
Similarly, if a physician wanted to know how often patients were discharged with high blood pressure, he might choose to include only the most recent observation (i.e. final observation) for each admission/visit.
Click Next when you’re happy with your selections, and move on to the Where: step of the process.