- Home
 Atmolytics
-
Apps
-
Activity counter
-
Activity Counter: report creation
Activity Counter: report creation
To create an Activity Counter report:
You’ll be taken to the What: screen:
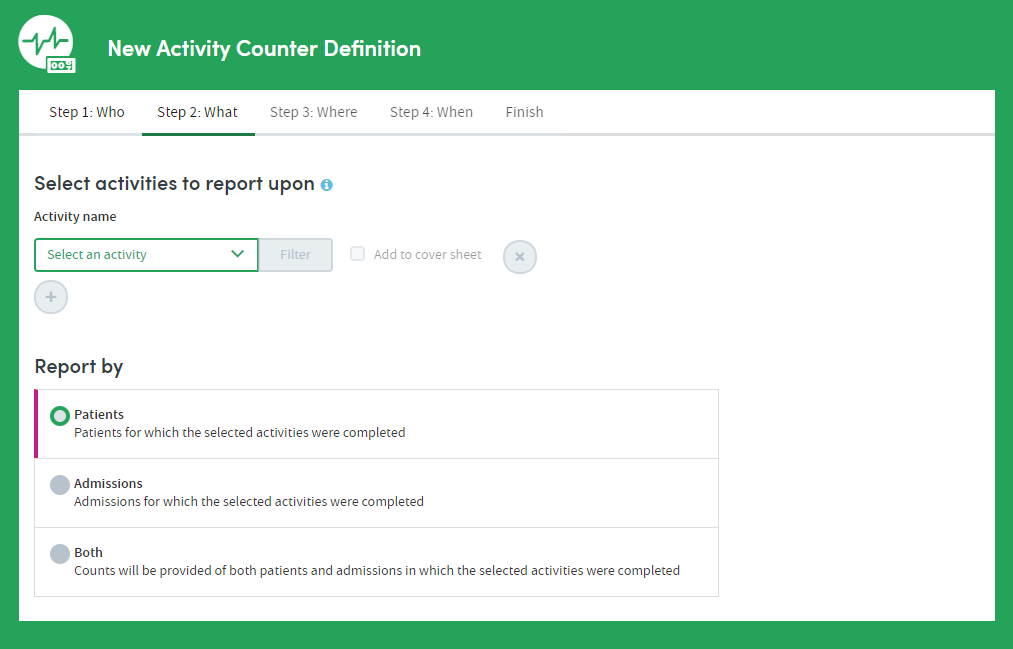
Here you’ll:
- Select activities to report on;
- Filter your chosen activities; and
- Choose whether the report data will be counted and reported by patients, admissions, or both
These steps are fully explained in the tabs below.
You can select any number of activities for inclusion in the report. Choose from those available to you by clicking Select an activity:
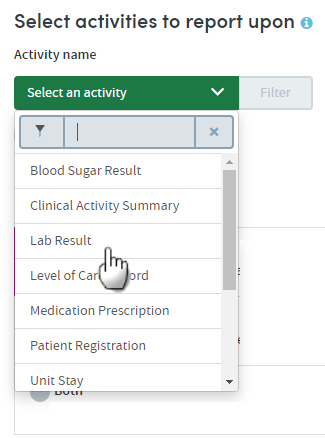
There are two ways to identify and select activities: by simply choosing from the drop-down list, or by searching.
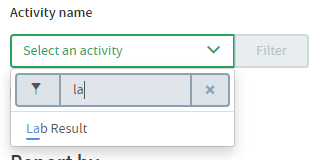
How to search for activities
Start typing your search text into the grey text box:

The list below will dynamically display all the activities containing your search text, wherever it appears in the name:
Once you’ve found your activity, click the text of the activity name to select it for inclusion in the report. The activity name will be displayed on screen:
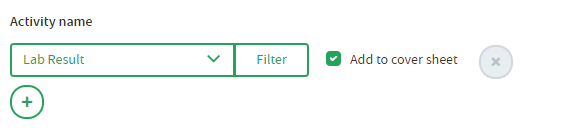
Click the + button to add another activity to your report.
Click the x button to remove an activity.
Add to cover sheet
Every report output has a cover sheet which shows a selection of the full report results. You may select up to four activities to include on the cover sheet, and you must select at least one, using the tick boxes.
You can add further filters to your report criteria if you wish, to narrow down the data included in your report.
For example, you may want to report on the number of HGB lab results in your cohort(s).
To do this you’d first choose the Lab result activity. Next, click the Filter button next to the activity you’ve chosen. You’ll see a pop-up screen similar to the one in the example below:
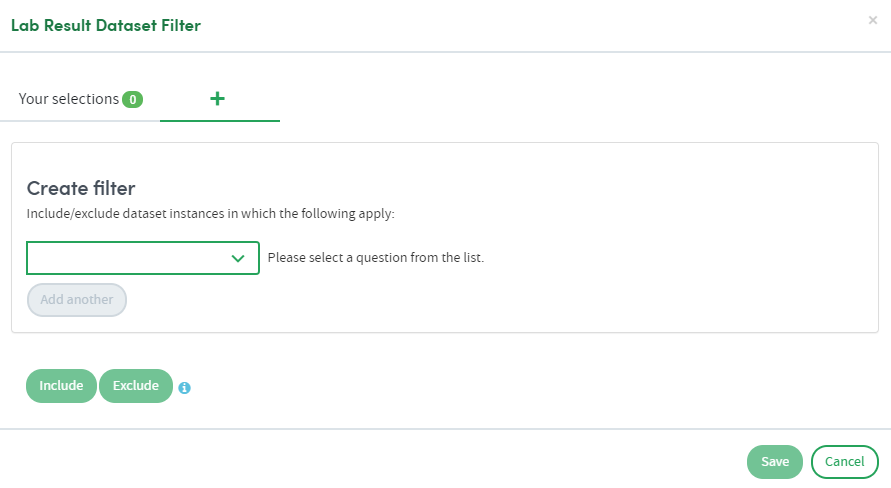
Click the drop-down arrow to select a question from the list (in this case, the Lab test item).
If you prefer, you can search for the item instead of browsing the list. Enter the search text in the grey text box. Either way, click the item to select it.
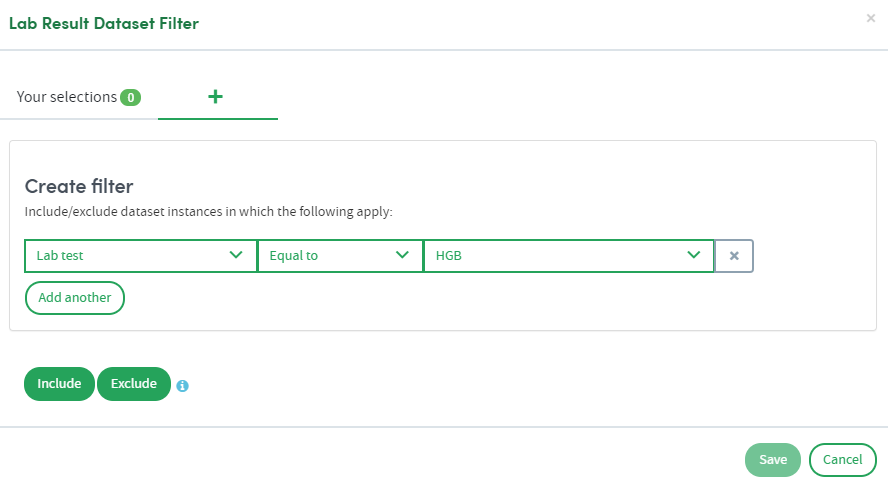
Every selection has three elements:
- The data item or question, e.g. Lab test
- An operator, e.g. Equal to
- The answer, e.g. HGB
Make your selection from the drop-down lists. In the example above we have selected Lab test > Equal to > HGB as a filter.
Click the X on the right if you want to remove a filter after you have set it.
At the bottom of the panel there are two buttons, Include and Exclude. Choose whether your report should include or exclude the filter criteria, by clicking one of these options. Once you’ve done that, your filter will be applied, and you can add more filters if you wish.
If you want to create several Include filters, click Add another to add more filter items, before clicking the Include button. The same applies to the Exclude option.
Viewing and working with your filter selections
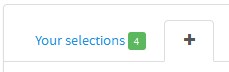
The number of filters you have created can be seen next to Your selections towards the top left of the panel:
You can view and, if applicable, make further decisions about how your filters are applied in the Your selections tab:
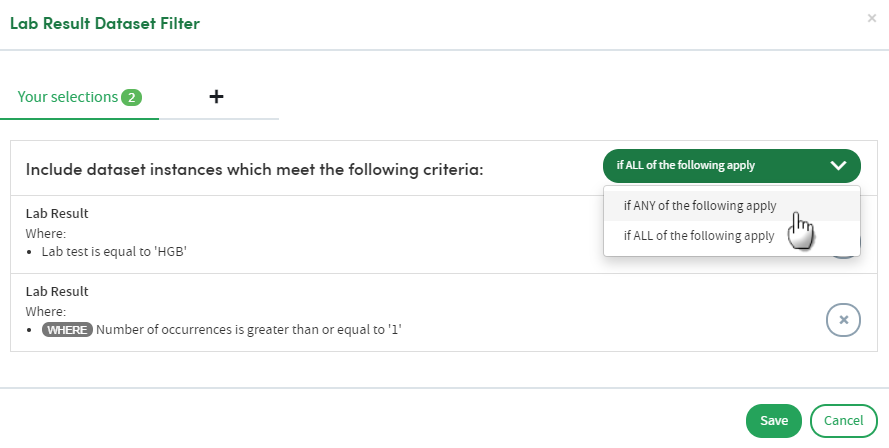
Click the white down-arrow to choose whether to select patients who meet ANY of the criteria or ALL of the criteria. This can be selected separately for both inclusions and exclusions.
Click the cross to remove a filter from your selections.
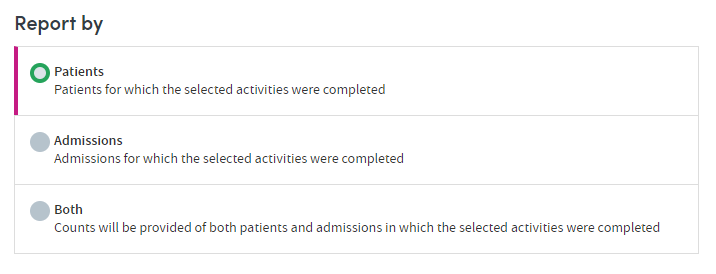
Choose which counts you want to appear in the report. You can include Patients, Admissions, or Both.
If you choose both they will appear as separate graphs in the report.
Click Next when you’re happy with your selections, and move on to the Where: step of the process.