- Home
 Atmolytics
-
Apps
-
Data export
-
Data Export: report creation
Data Export: report creation
To create a Data Export report:
1 Select the App
2 Follow the Who: step to choose the cohort(s) you want to report on
You’ll be taken to the What: screen:
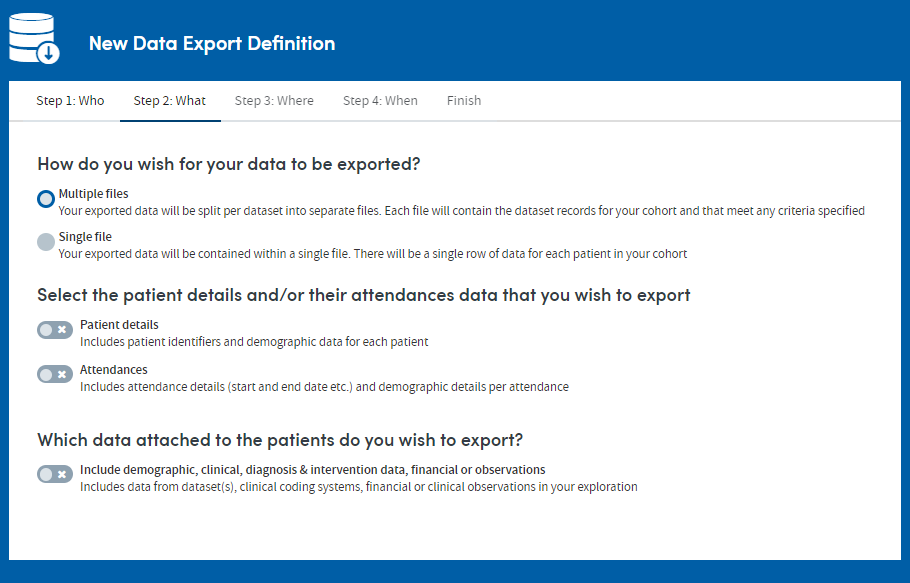
Here you’ll:
- Select what format you want the data to be exported
- Select the patient data to export;
- Select the data attached to the patients to export; and
- Choose any additional fields you want to export
These steps are fully explained below.
Choose the format for your exportable files by selecting either the Multiple files or Single file radial.
- Multiple files is a good option if you require multiple lines of data for each patient. For example, you may wish to see all instances of a risk assessment, rather than just the latest recorded instance.
- Single file is a good option if you wish to see the latest data for each patient. Each patient will occupy a a single row within the export, with the selected data items from across datasets displayed in columns.

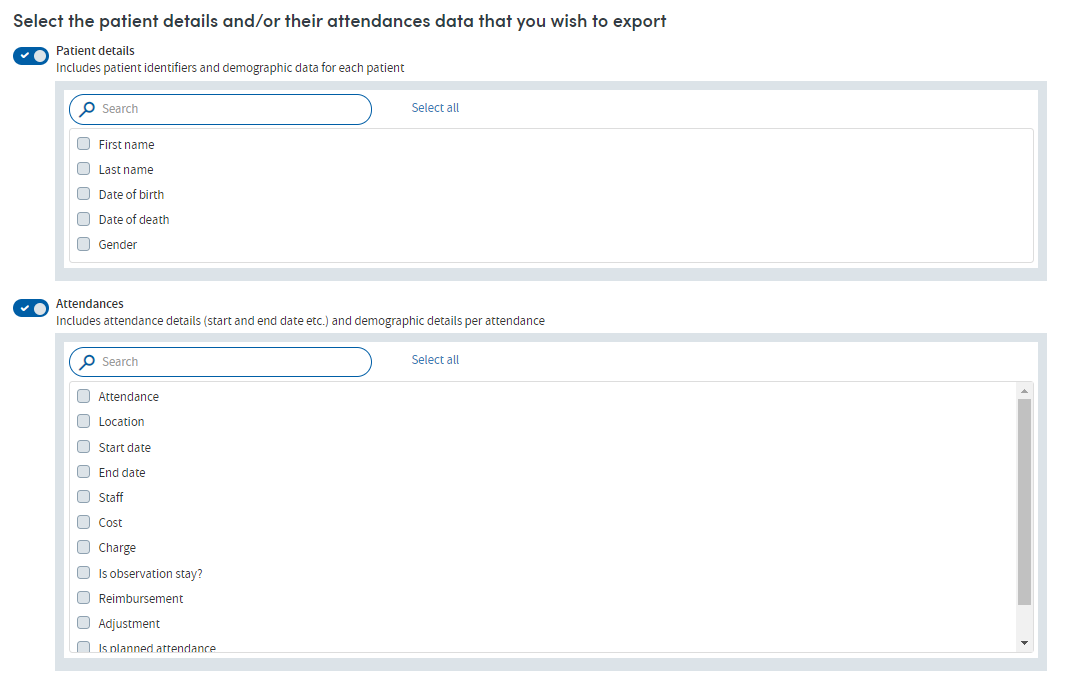
Use the toggle buttons to select one or both of the options: Patient details and Attendances/Visits. If you chose Multiple files in the previous step, these will be exported as one file, whether you select items from one or both of these sections. If you you chose Single file in the previous step, these items will each be added as a column to your export.
Choose any of the data available by firstly selecting the toggle next to Include demographic, clinical, diagnosis & intervention data, financial or observations.
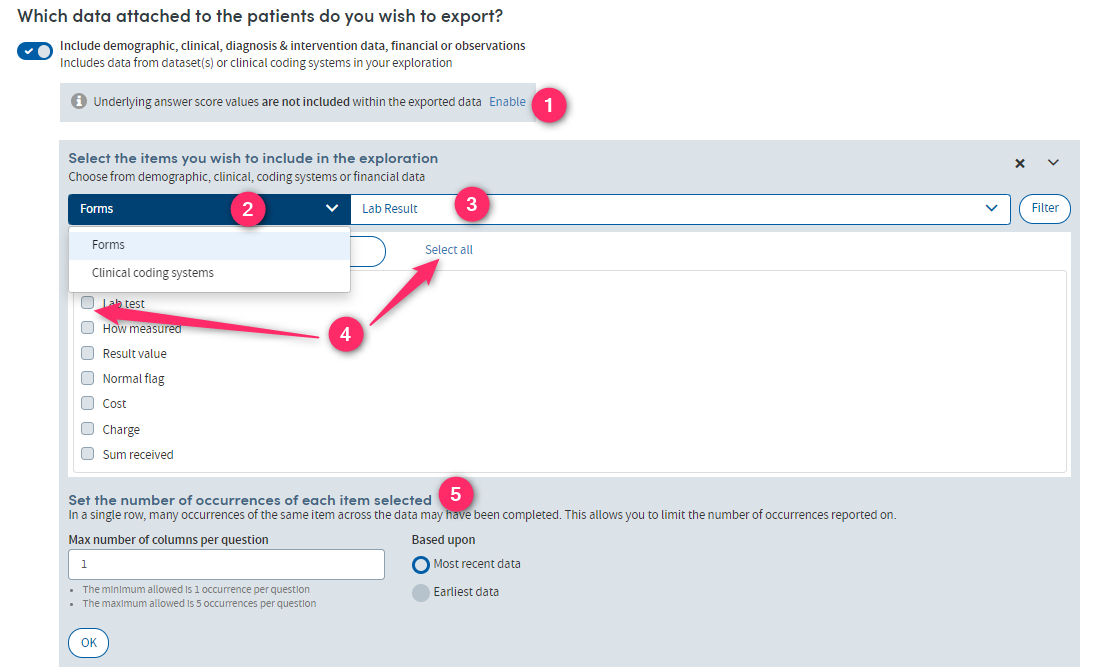
Enable or Disable the inclusion of underlying values. This is a value that is associated with the answer value and it will be added as a column of data to the export, alongside the answers. For example, a pain scale of:
- none
- low
- medium
- high
might have respective underlying numeric values of:
- 0
- 1
- 2
- 3
Both sets of values will be exported as separate columns if this setting is enabled.
2.
To find the datasets and items you wish to include in your export, select from available Forms or Clinical Coding systems.
3.
Search for datasets
Scroll down the list or start typing your search text into the grey search box:

Click on the required dataset to display the data items available for selection.
If you are viewing clinical coding systems, the data items displayed are additional fields associated with the hierarchy of the coding system. Choose one or more of these to add to the export and this will accompany the code and the name of the coded item e.g. diagnosis, procedure etc.
4.
Select the desired data items from the chosen dataset.
If you wish to add more data items from a different dataset, select Add Another below the data item list. This will add a second box.
Repeat the steps above to chose more datasets and items.
5.
When using Single file mode, you can include between one and five occurrences of the same item. The default is to include just the latest occurrence. To alter this, select Change at the foot of the data item list:

Each occurrence of the same answer will appear as a column of data in the export.
When using Multiple files mode, there is an option located at the foot of the page to choose Additional fields. These will be added to each dataset you have selected in the previous steps.
Select Change to view the available fields. Search for a field and select those required by using the checkboxes next to the item, or press Select All.

Filtering Datasets
You can apply a filter to any selected dataset. This will allow you to refine the content of your export to include or exclude specified criteria within the recorded data. The filtering system works exactly as it does within the Cohort Discovery part of Atmolytics.

Example:
You have selected the clinical coding system ICD-O 3, but you are only interested in exporting the data that patients have relating to a few named cancers. Each of the patients within the cohort may have other cancers outside of this list of named cancers, which you do not wish to export (even if you have defined the cohort to include only patients with those cancers). Applying an inclusion criteria to the data for just the list of cancers for which you want to export data will ensure your export does not contain other unwanted information.
Removing a dataset
If you wish to remove a dataset from your export, click on the x icon within box containing the relevant dataset:

Click Next when you’re happy with your selections, and move on to the Where: step of the process.