- Home
 Care Partner
-
Software
-
Service user records
-
Summary
-
Service User Bulk Print
Service User Bulk Print
Navigate to the Service User Bulk Print wizard by clicking on the print icon from any tab within the service user record.
![]()
-
1
Scope
The first screen within the wizard is the ‘scope’ screen. Here a user can select which centre of care information is to be exported.
This list of involvements will only display what the user has access to see. Admin users will see all centres of care that the service user is involved with.
The user can then decide whether to export information from open, closed or all involvements.
In the image below, this service user could have the following involvements:
- Ipswich (open)
- Swindon (open)
- Ipswich (closed)
If the user wanted to select all current information for the service user, they would tick both centres of care and ensure ‘only open involvements’ is selected. That will ensure information for both Ipswich and Swindon involvements are exported, but not information from the close Ipswich involvement.

Click ‘next’ to select a time period for the data.
-
2
When
Next the user can select a time frame to limit the data exported to. For example, for FOI requests, an ‘all time’ export may be sensible, in which case, select ‘do not apply time frame’. However for information to take to an MDT meeting, the user may just want to export the last week or months’ worth of data. In which case either ‘limit by date’ to manually enter a start and end date, or ‘limit by time period’ and select a pre-defined time:
- The last week (i.e. 7 days ago to today)
- The last month (i.e. 30 days ago to today)
- The last quarter (i.e. 3 months ago to today)
- The last year (i.e. 12 months ago to today)
- All time
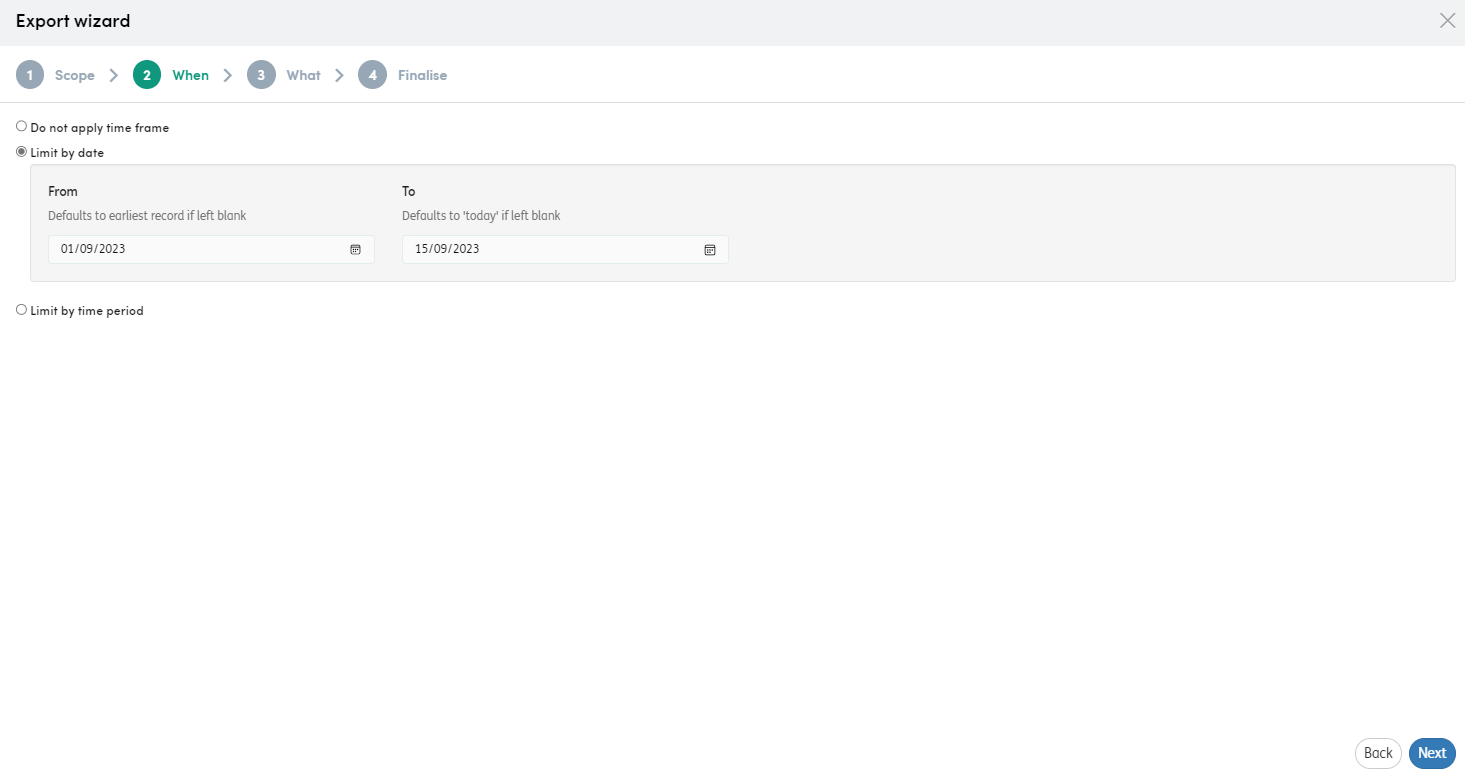
Click ‘next’ to select what information to export.
-
3
What
The user can now decide which data points need exporting:
- Service user details - If selected, either or both of ‘Personal details’ and ‘Other personal details’ must then be selected.
-
Activities - Activity records, Assessments, Contact Records and accompanying key item reviews (also offers the option to include any form-based Care Plans).
For Contact Records, the user can decided to ‘aggregate’ the files which will export Contact Records of the same type into one continuous .PDF file.
- Diagnoses - Both current and historical and Primary, related, unrelated and provisional.
- Contacts - Personal and Professional.
Please note: Service user details, Diagnoses and Contacts are not scoped by centre of care, therefore all users will be able to export this information for a service user, even if these data items relate to involvements that they are not assigned to.
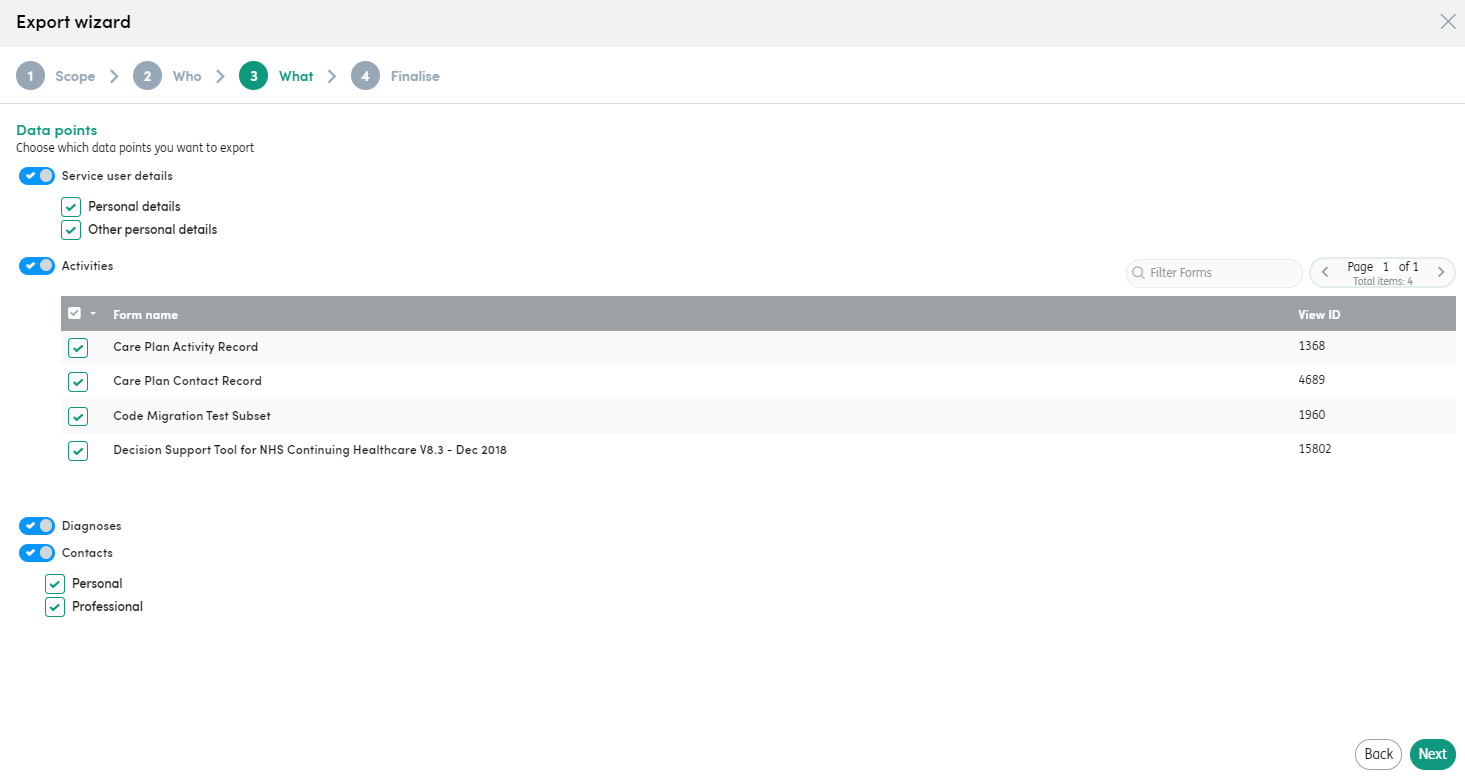
Click ‘next’ to finalise the export.
-
4
Finalise
The final step allows the user to review the contents of the export before saving and exporting.
Within this screen, the export can be given a meaningful name so it is easy to identify who & what is being exported.
If contacts have been selected for export, the user has an additional choice as to export as a .csv file, .PDF file or both.
.Csv files can be opened in MS Excel and the data uploaded to a 3rd party system.
.PDF files are read only files that might be used for a FOI request or as handover to a new team for example.
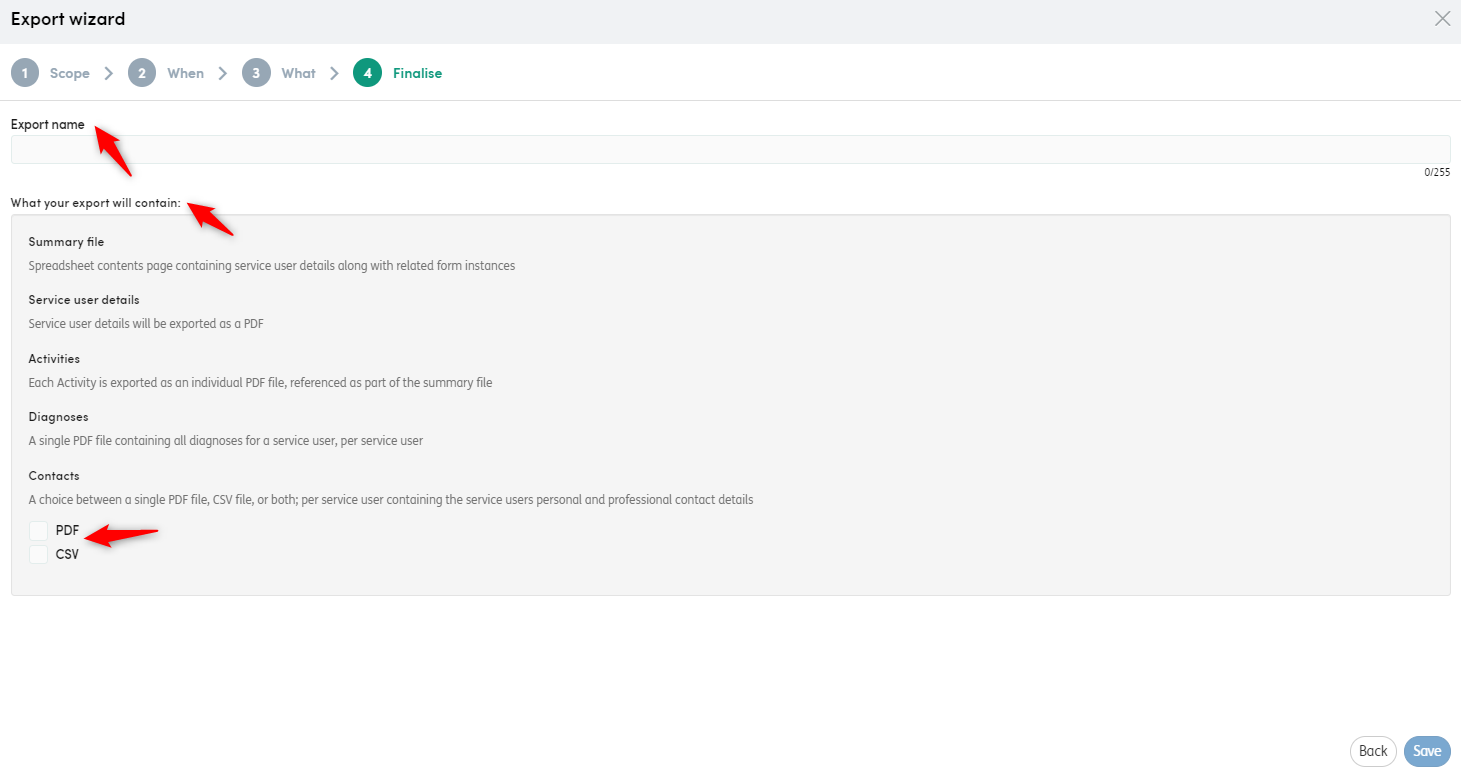
Once the user has clicked ‘Save’ the system will start to export the data.
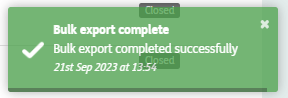
Notifications will appear in the bottom right-hand corner of the screen informing the user that the export is being created (blue) and that the export is complete (green). Depending on the amount of data within the record, the time for this will vary. Users can continue to navigate to various screens within Care Partner and the export will continue in the background.

The bell icon in the top right of the screen will animate and change to an orange colour once the export is ready to download. Click the bell notification to display available exports. Click on the export to download to the Windows ‘Downloads’ folder.

Please note: If a user has more than one staff member assigned then the export will only be available for the staff member that requested it.

Export Contents
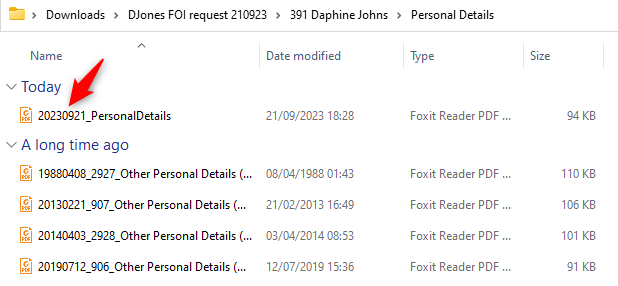
The export will usually download to the users Windows Downloads folder, unless local configuration overrides this.
The export will initially be a compressed zip folder. This will be named using the same name which the user entered in the ‘finalise’ step.
Within the zip folder should be a sub folder which has the internal ID for the service user and the service user’s first and last names.
Nested within this folder there will be various files and folders depending on what data the user chose to export. An example of a full record export is below:

Export Overview: When ‘Personal Details’ and/or ‘Other Personal Details’ is selected within the export wizard, the export overview spreadsheet will populate with the current information for these data points for the service user. If neither are selected during the export wizard steps, this spreadsheet will still populate with identifying information for the service user.
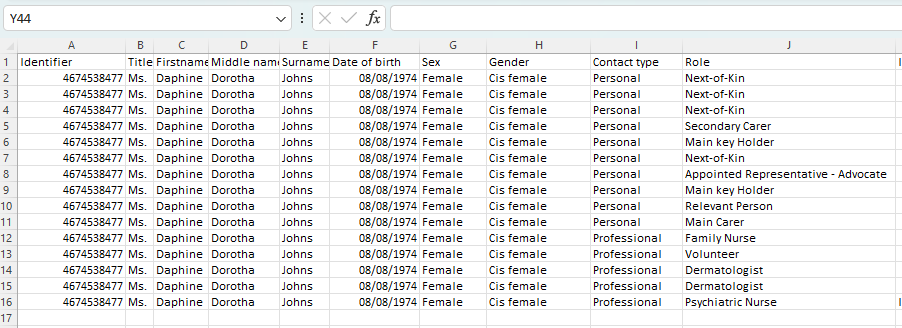
Contacts folder: will contain a .csv file, a .PDF file or both depending on what was selected within the wizard.
The .csv file can be opened using a spreadsheet program (e.g. MS Excel). Columns A-H will contain identifying information for the Service User (ID, title, name, DOB, sex and gender). Columns I-AJ will detail contact information.
Contact information is sorted into alphabetical order by the contacts last name.

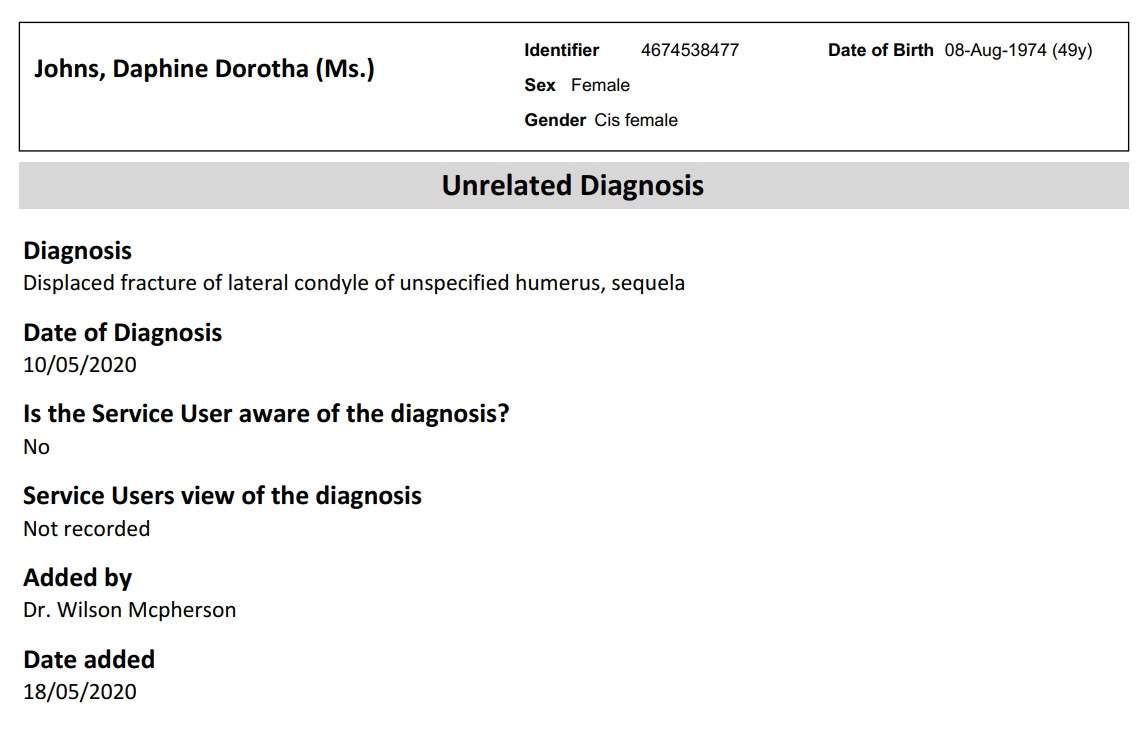
The .PDF file displays the contact information in a more easy to read format:

Diagnoses folder: contains a single .PDF file detailing all diagnoses added to the service user’s record.
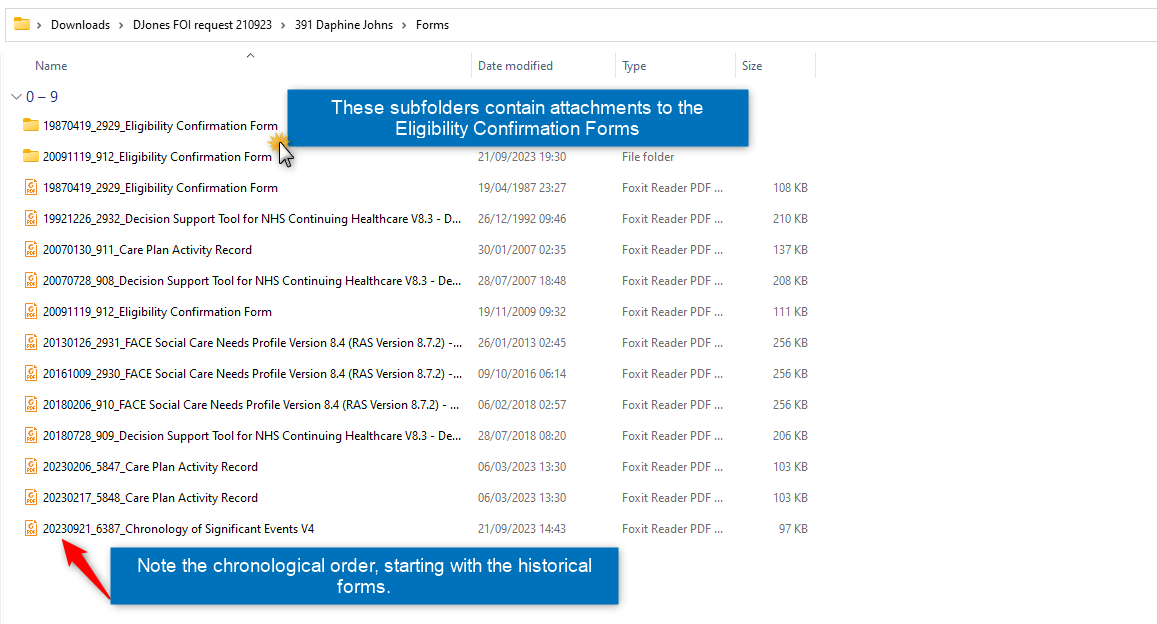
Forms folder: this folder will contain a .PDF file for each activity completed within Care Partner. If an activity had an attachment uploaded to it, these will also export and can be found in the sub folder with the same name. Each file is pre-fixed with the date of activity and is exported within chronological order.
Personal details folder: will contain a .PDF file of each saved version of the personal details form from Care Partner. Each file is prefixed with the date of the form.