- Home
 Atmoforms
-
Software
-
Patient appointments
-
Creating an Appointment
Creating an Appointment
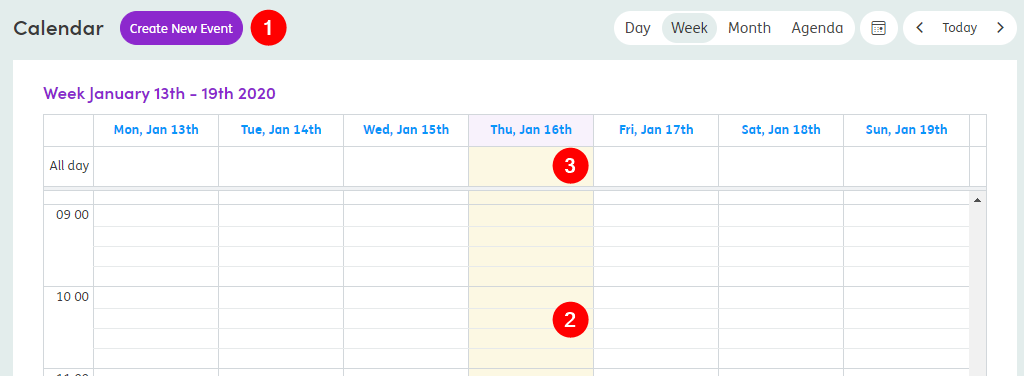
There are three ways to create a new event in the Calendar:
-
1
Click on the Create New Event button.
-
2
Navigate to the required day on the Calendar and click on the start time, then hold-and-drag your mouse to the end time to highlight the duration of the appointment.
-
3
Click the All Day section in the week view or click on the day in the month view of the calendar. This will create an all-day event.
A blank pop-up will then appear where you can fill in the required details. If you have used the mouse to drag and drop, the event pop-up will open with the time and date filled in.
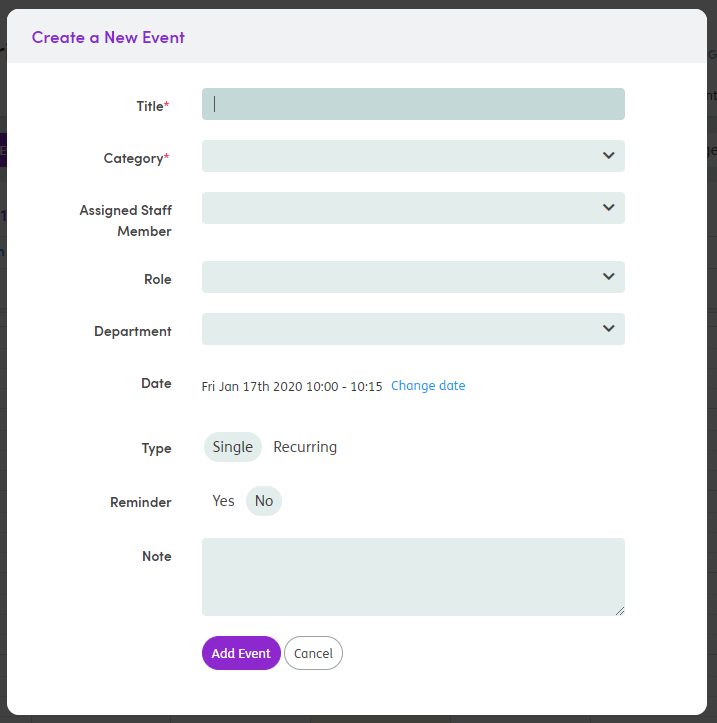
The Create a new event pop-up has six fields you can edit and add information to:
Title: Can be added and edited.
Category: Contains a drop-down list of categories for the event. This list can be edited by your system administrator.
Assigned Staff Member: Choose a staff member.
Role: Choose a staff role (this may be more applicable than selecting a specific member of staff).
Department: Select a department. Those available will depend upon which department(s) the patient has open enrollments with.
Event Start/End Date/Time: You can view the selected date and time and edit this if required.
Type: Select Single or Recurring to schedule the event as a one-off event or an event that will be repeated daily, weekly or monthly. The default selection for a recurring event is for it to occur daily with no end date. You can customise this as required.
Reminder: Select Yes or No to choose whether this event should have a Reminder. Reminders are useful for important events and for events that need the patient’s attendance recording. Event information that has a Reminder set is pulled through to the Notifications section.
Note: A note can be added with any further details of the event.
Fields with a * are mandatory. When creating an event, the Title, Category and Start/End Dates/Times are mandatory fields.
Click Add Event when you have entered all relevant information. The Calendar will be updated with the new event. In the image below, you can see the event in the future.
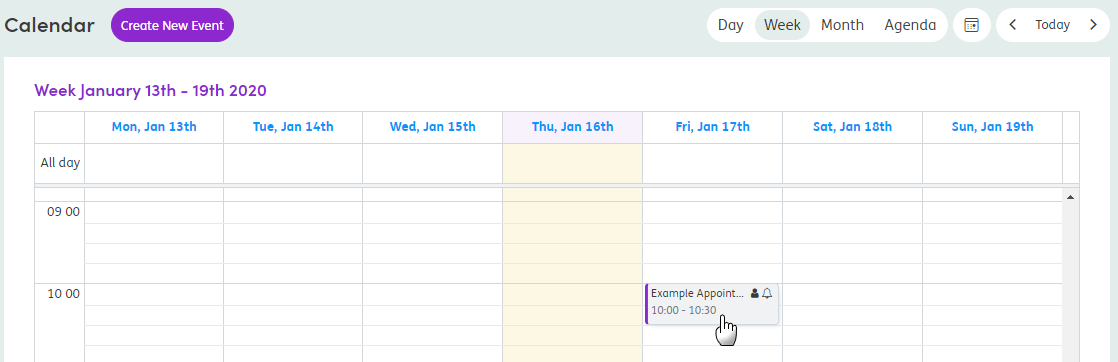
The image below shows a past event indicated by a gray border and an upcoming event with a purple border.