Atmoforms Release Note v3.09
Version 3.09 Latest Features and Functionality
This document describes the additions and changes in functionality to Atmoforms in version 3.09 of the software. This release note describes changes to Atmoforms since V3.07.
Conditional Logic Support
Atmoforms 3.9 now supports forms that contain conditional (branching) logic. There isn’t anything required within Atmoforms to enable support other than to import and assign a form coded with this logic exported from the latest release of builder (2.23).
Conditional logic fields are initially displayed hidden until questions used in its formula are answered and the formula evaluates as true. The user will then see the corresponding questions appear on screen. Should answers to questions be changed so that the conditional formula evaluates as false the questions will be hidden. This will remove any stored answers for those questions and any child questions should there be any.
- Enumerated answers will be set to their default null answer
- Subform instances will be removed
- Numeric, Text, Date questions will be set to blank
Please reference the builder v2.23 release notes for information around how to set up conditional logic within forms.
Important Field
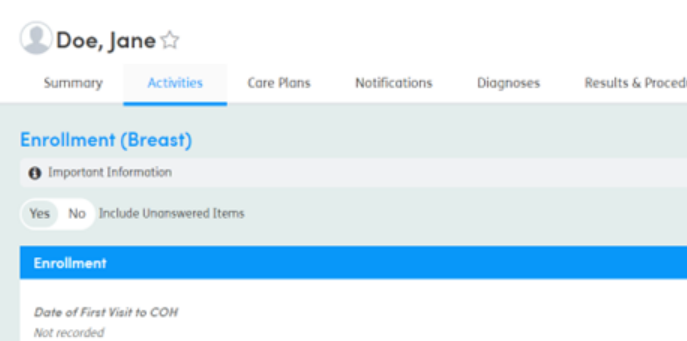
The important field feature allows for a user to provide a form description to portray information about the form which is displayed on the list view, form view and edit pages so it can be easily seen by the user.
Setup
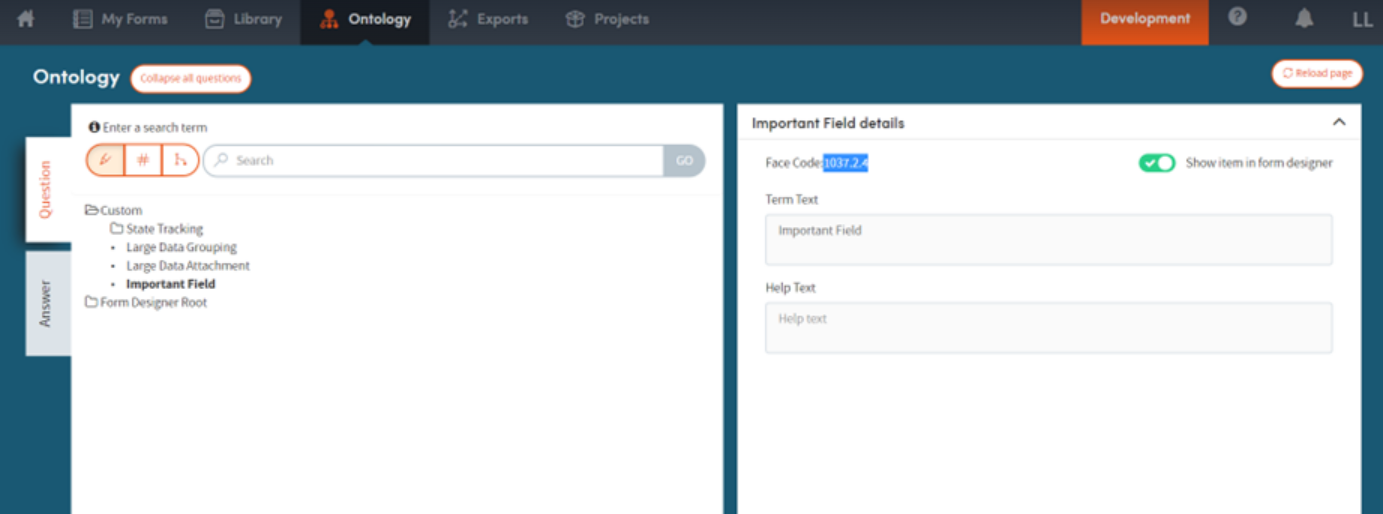
Within Builder, open the Ontology tab. Expand the custom dropdown and click the Important Field option. Copy the facecode.

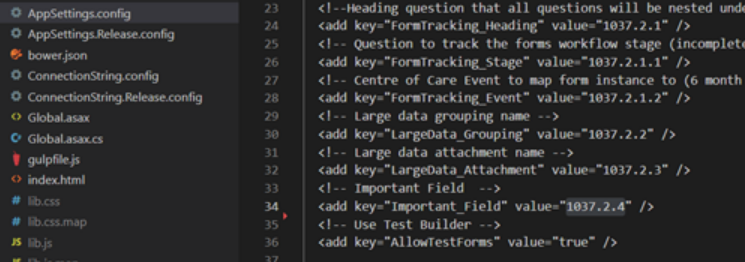
Open AppSettings.config for Atmoforms, replace the importantField value with the copied facecode.

Use
Enabling this option will add a dedicated column to the stagingDatabase package for this table that can then be populated. Data imports into the system using the mediator bulk or prospective loads will then copy this field into the form description field which is displayed in the list view and within the form view and edit pages.

The field can be seen at the top of the Form View page:

The field can be edited while editing the form by using the edit icon:

The value of the field can then be changed. The change can then be abandoned or saved by using the Cancel or Save buttons.
