Configuration Re-alignment
How to Use the Configuration Realignment Tool
Follow these simple steps to realign your existing cases with your newly configured rates:
Step 1: Access the Config Realignment Tool
- Log in to the Formulate Portal with an elevated user account.
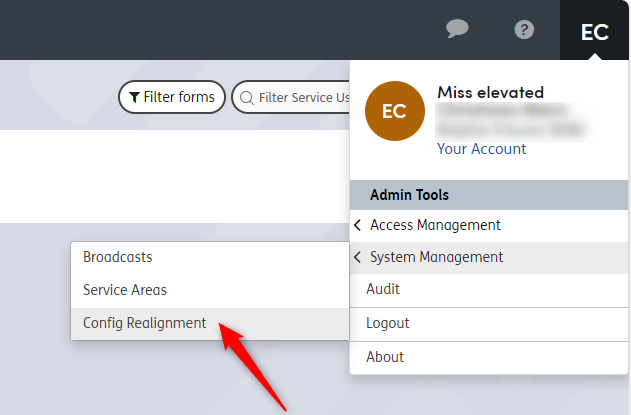
- Click on your initials in the top-right corner of the screen, and select “Config Realignment” from the dropdown menu.

Step 2: Select the Form and Service Area
-
Choose the appropriate Form and Service Area from the dropdown menus.
Tip: If you need to update multiple Service Areas, repeat this process for each one.

Step 3: Process and Review Changes
-
Click the “Process and Review” button.
Important: This step will not apply changes immediately. The system will provide a preview of the updates for your review before saving.
Step 4: Automatic Recalculation of Estimated Budgets
-
The system will recalculate the Estimated Budgets based on the new rates you’ve configured.
Note: This applies to all cases in the system and may take some time depending on the number of submitted cases for your organization.

Step 5: Review the Summary Page
-
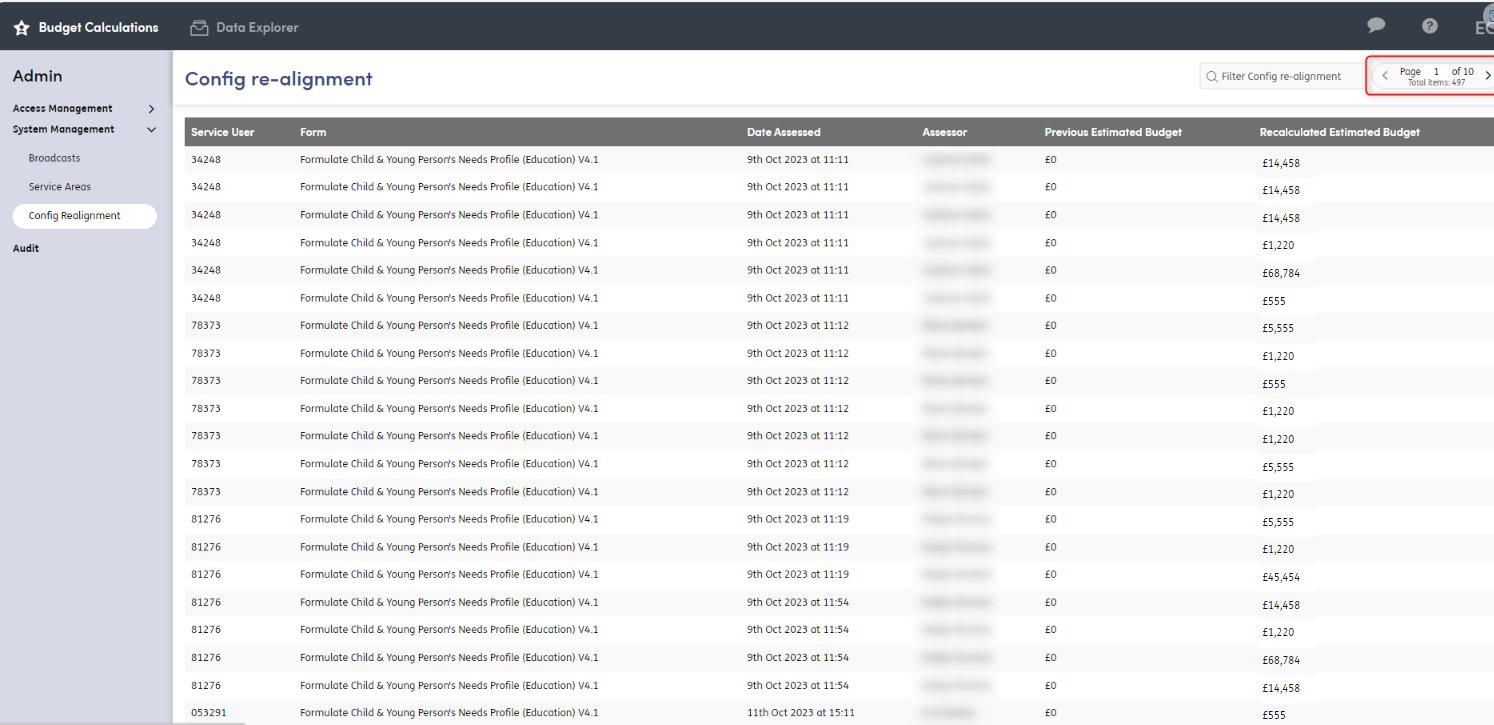
Once processed, you’ll see a summary table with detailed information, including:
- Service User ID number
- Form name
- Date/Time assessed
- Assessor’s name
- Previous Estimated Budget
- Recalculated Estimated Budget
-
Cases are listed from oldest to newest. Use the page tabs to navigate through all entries.

Step 6: Apply the Recalculated Budgets
- When you’re satisfied with the updates, click “Apply Recalculation” at the bottom of the page.
-
Confirm your choice when prompted.
Warning: Once you confirm, all Estimated Budgets will be updated. This action is final and cannot be undone.
Step 7: Confirmation
- After applying the changes, a confirmation screen will appear, letting you know the action was successful.

Additional Information
The Config Realignment feature includes a built-in audit trail. It records when the realignment process started and when it was completed, ensuring transparency and accountability.